For the first lesson will start with a basic sight-size style exercise. But note while this method will be used it will not be the only method. And it will be combined from the start with other methods.
Now for a little over view. Sight-size involves setting up your subject and you canvas side by side. And working 1 to 1 so that you are neither enlarging or shrinking your work compared to the original. This allows you to easily measure from one to the other. And I find it an effective way to learn to be accurate. But as a draw back if you only do this you can quickly become a slave to only working this way. For a more on the pros and cons you can read this http://www.atelierstockholm.se
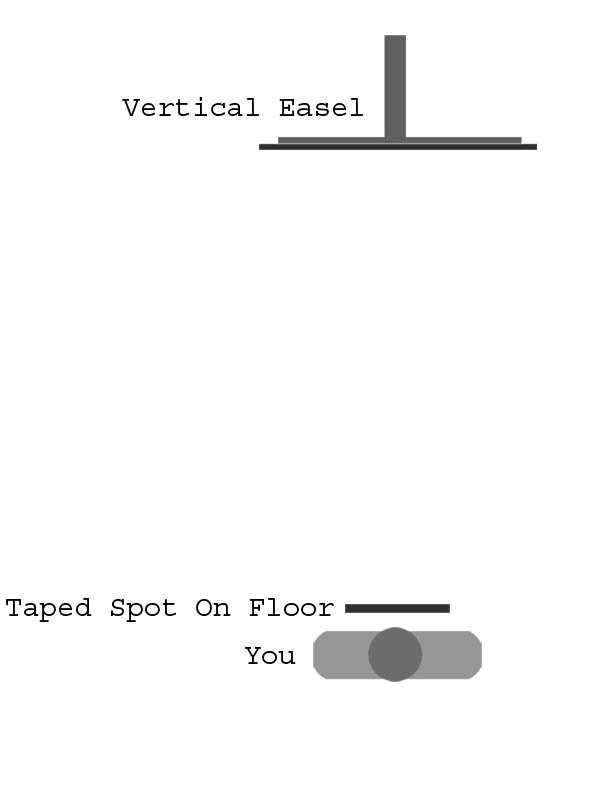
OK so on to setting things up. First you have to have your easel completely vertical. Or you could always screw piece of masonite from Home Depot to your wall and use that. Next print off the plate 1 (eyes) from Bargues drawing course. (Link to plate 01) For size I normally use 11×17 for this since I can find cheap paper for my printer this size. Or you could print the plate in two parts on normal size paper if you like.
Now tape your printed plate and the paper you are going to be working on side by side. Then measure off a distance of about of about 5 feet or what feels comfortable from your easel. (See illustrations below.) Just make sure not to change the spot after you start working unless you start over.
Next find a piece of thread in a color that’s easy to see. Cut about 3 or 4 feet of it. Then tie a nut of something heavy enough to weigh it down at one end. With this string holding your arms out strait in front of you you can measure your subject and drawing. For vertical measurements just hold the top of the string and let the weight pull it perfect vertical. For say doing an angle hold one end of the string in each hand and keep it tight with your arms strait. You can then look at your subject and get the string perfectly aligned with the line on your subject you want to judge. Then turn slightly so you are looking at your paper. Still with your arms strait. Carefully make note of the angle then step forward and make the mark in a clean sure manner from point to point. Try not to pad your lines. Step back and judge your mark using the string in the same way again. If it looks off then fix it:)
After you have done all the eyes get out your tracing paper. Carefully tape it over your eyes printout and trace each eye. Now pull it off and then place it over the eyes you have drawn. Doing this will let you see how accurate you really were.
Also remember to hold the pencil correctly. And stand back and use your entire arm not just your wrist.
Repeat this exercise until the eyes are perfect when you test them using the tracing paper. I will also be loading some more places as the next part of this exercise.


You might also find this online tutorial helpful in understanding how to do this exercise. Drawing with the site-size method
Here is a short video on youtube that will give you a better idea of what the illustration above is showing. The related parts start at about the 1:30 mark.
If you would like a DVD on learning sight-size you can fine a good one here http://www.sightsize.com/dvd.html .
You can also I believe rent one here http://smartflix.com
Lesson 01 Drawing Part Exercise B coming next.